Microsoft Outlook 2000 Filters Guide
The J T Response email server uses Spam Assassin to mark messages likely to be spam.
In this post we are going to explain how to set up your own personal filters on Microsoft Outlook to move messages marked as SPAM to your junk folder. We used Microsoft Outlook 2000. If you have a different version of Outlook the details may vary slightly.
To start we need to get to the part of Outlook were we can edit filters.
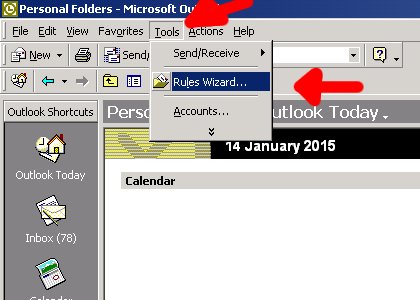
Open up Outlook and in the top bar you will see some options.
Click on Tools. (shown by the red arrow at the top of the image, below).
Select Rules Wizard (shown by the red arrow near the top of the image, below).
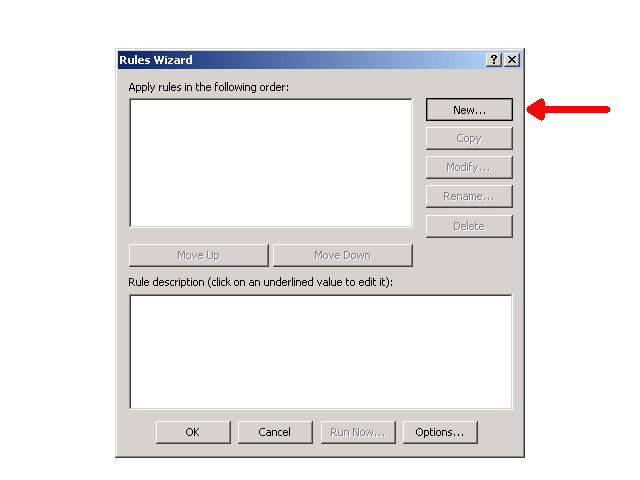
The rules wizard will open in a new window. Click the New… button (shown by the red arrow in the image below).
This will open a new window.
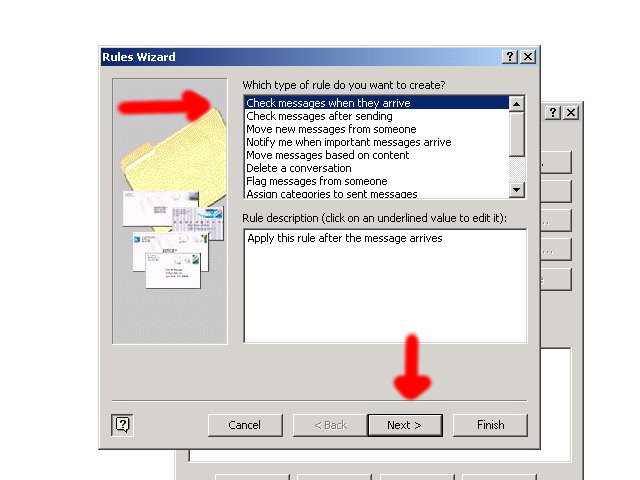
Select “Check messages when they arrive” (This is shown by the red arrow at the top of the image below).
Click the Next button
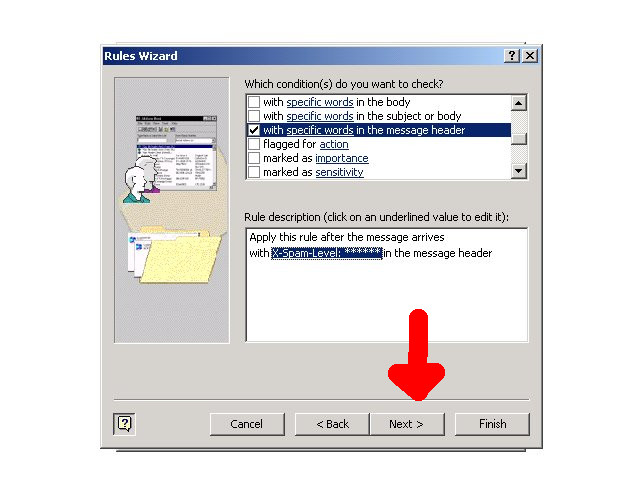
Check the box next too “with specific words in the message header” this is located about halfway down the list (As shown by the red arrow near the top of the image below).
In the rule description you should now see the condition you added.
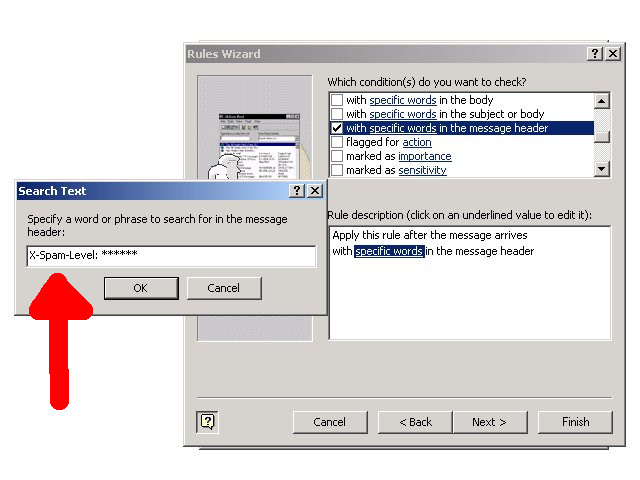
Click on specific words (As shown by the red arrow near the bottom of the image below). This will open up a new window.

In the Search Text box Enter “X-Spam-Level: ******” Then click OK
Click the Next button
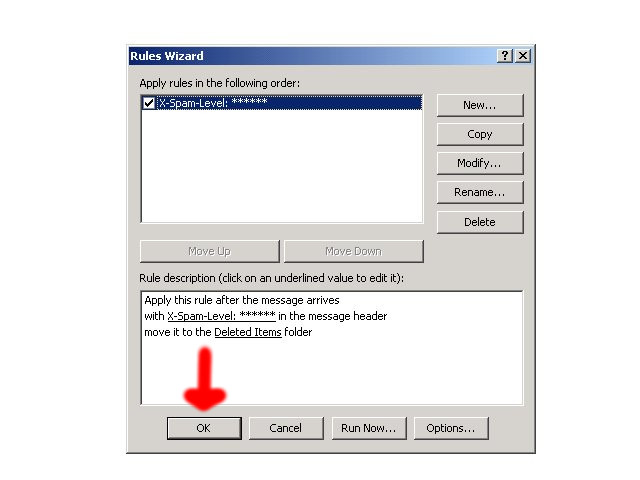
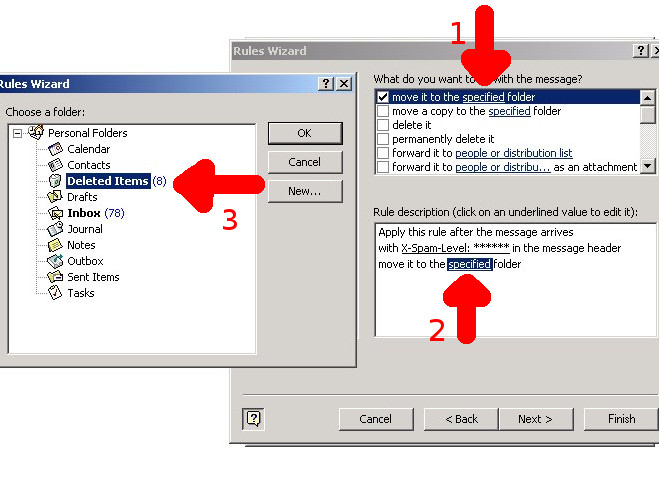
Check the box next to “move it to the specified folder” (As shown by the red arrow labelled ‘1‘ in the image below).
Click on specified located in the Rule description box (As shown by the red arrow labelled ‘2‘ in the image below). This will open a new window.
Select Deleted Items (As shown by the red arrow labelled ‘3‘ in the image below) then Click OK.
Click on Finish

Click on OK