Mozilla Thunderbird 31.0 Quick Start Guide
Recently, we have been hearing many more reports of people having various issues configuring and setting up their email accounts using varying range of email clients. This guide will be the one of a series of guides which aims to help you through the process of configuring your email client to receive emails from your email account. Additionally, it will also show you additional useful settings and features which may help enhance your experience when using these email clients.
Today, we will be looking at my personal favourite email client, Mozilla Thunderbird. The version which I will be using in this guide is version 31.0. The steps in this guide may be similar to older versions of Thunderbird however, I cannot guarantee that they will be the same.
This guide is aimed at users wishing to configure their email client quickly.If you wish to view an advanced user setup guide, please look at this guide.
Mozilla Thunderbird 31.0
Setup
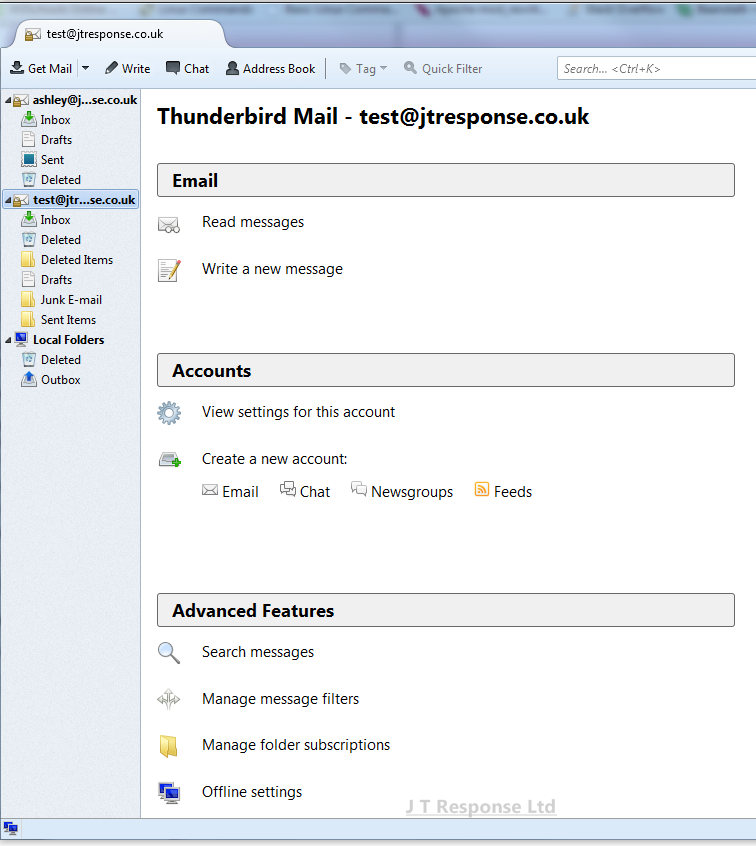
Upon loading Thunderbird, you will be presented with your local folder list. In this menu, you will be able to add your email account to the email client.
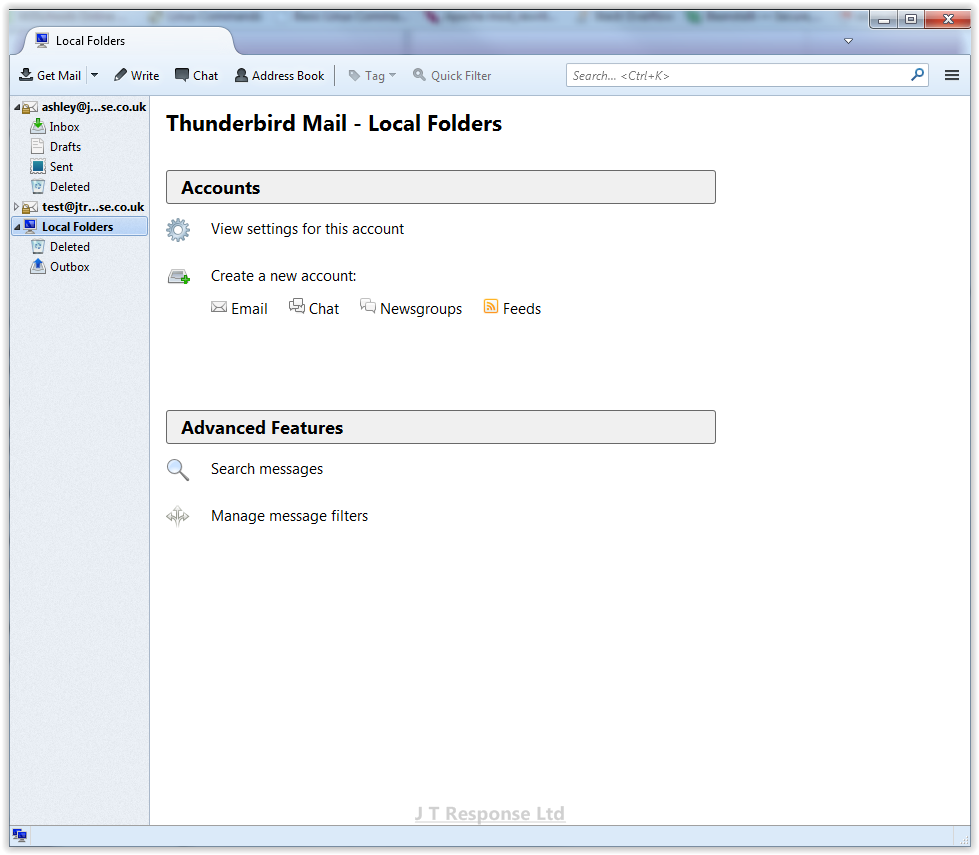
Automatic Email Account Setup
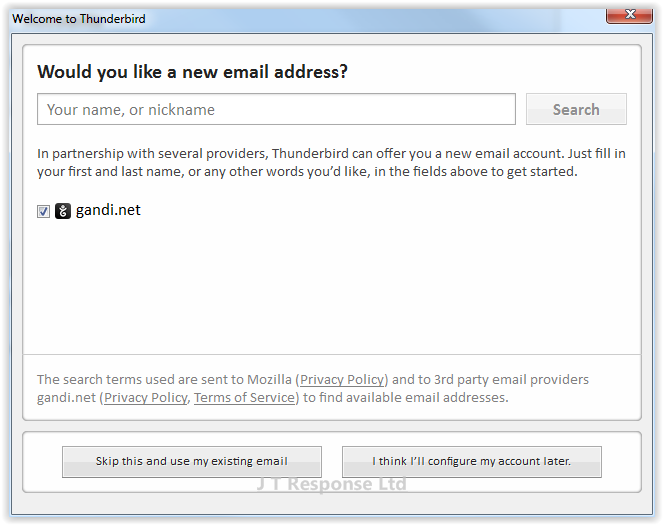
To add your email account to the email client, go to the Local Folders tab which should be displayed by the email client. Select the Create a new account section and press the email button. Press the button at the bottom of the window marked Skip this and use my existing mail to add our existing account to the email client.
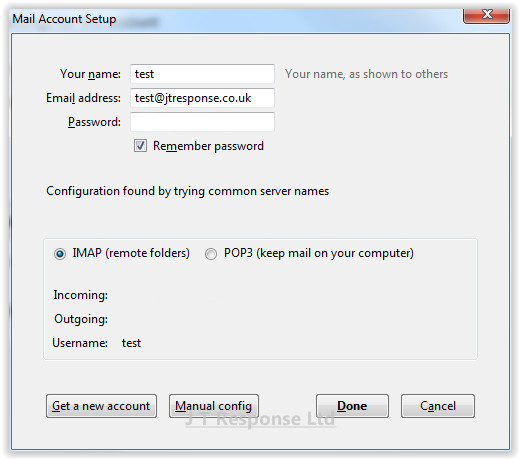
This will now bring up a window whereby we can enter our email account settings. There are several fields which you are required to complete in order to connect to your email account:
- Your Name:This should be your full name.
- Email Address: This should be your email address.
- Password: This should be the password you would use to log in to your email account.
Press the continue button to continue.

The email server and account details are listed in this window. Verify that these details are correct for your email server and if so, press the Done button.
Manual Email Account Setup
If you wish to manually connect to your email account from the Thunderbird client, you must first attempt to connect to it automatically. Please refer to the Automatic Email Account Setup section for steps to do this. Once you reach the final screen in the automatic setup, press the Manual config button at the bottom of the window.
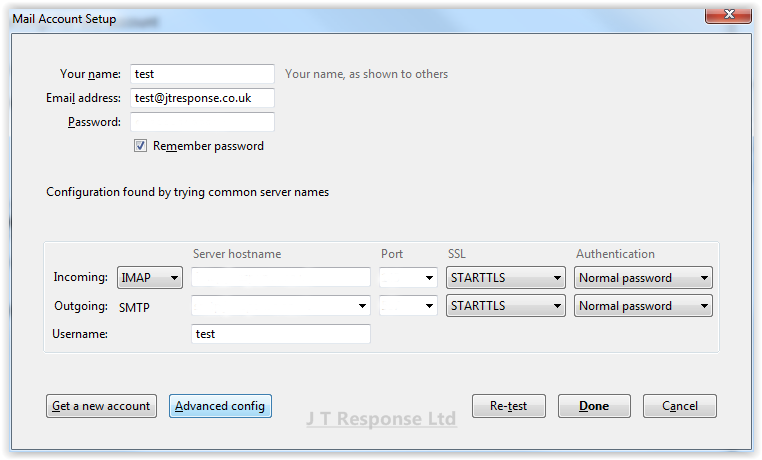
Here you can change all of the email server settings which were imported automatically by Thunderbird. Once you have entered the correct email server and account details, press the Done button. In this window, there are more fields which need to be completed in order to manually connect to your email account.
Incoming Server
- Protocol: If you are connecting to your email account using multiple devices, you should choose IMAP. If you are connecting to your email account using one device, you should choose POP3.
- Host name: This should be as follows, mail.<YOUR DOMAIN NAME>.co.uk. For example, mail.jtresponse.co.uk.
- Port: This should already be completed.
- SSL: This should be set to AUTO.
- Authentication: This should be set to AUTODETECT.
- Username: This should be your email address.
Outgoing Server
- Host name:This should be as follows, mail.<YOUR DOMAIN NAME>.co.uk. For example, mail.jtresponse.co.uk.
- Port: This should already be completed.
- SSL: This should be set to AUTO.
- Authentication: This should be set to AUTODETECT.
- Username: This should be your email address.
Features
Create Rule
Click on your email account in the sidebar to the left of the window. Press the Manage message filters button under the Advanced Features heading on the page.
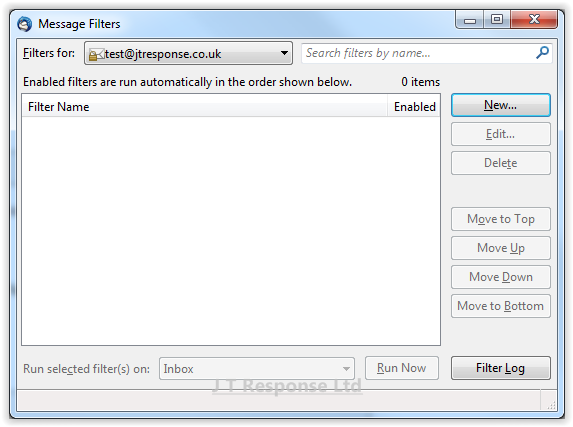
To create a new rule, press the New button.
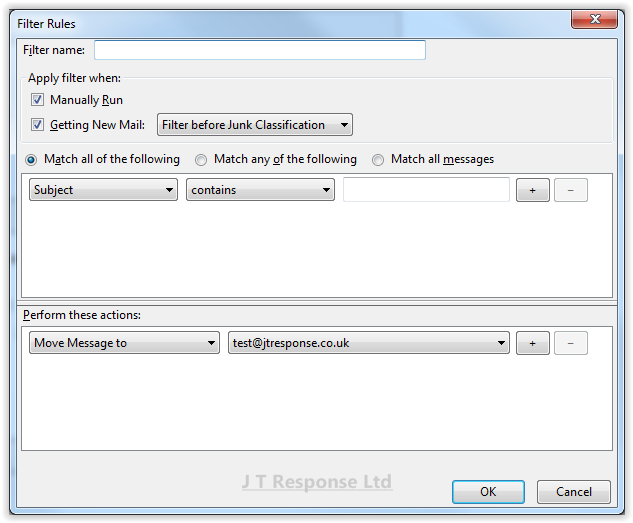
This window will display all of the information about the rule you are creating. At the top of the window, you can enter the name of the filter you wish to create. Below this, you can specify when the filter is run and whether the filter is run before or after junk classification.
The first box is a list of conditions that a message must meet to activate the rule. There are several options as to whether messages must meet all of the conditions or whether they can meet only one or more of the conditions in order to activate the rule. The first drop down contains the type of condition which is to be met. The second drop down specified what condition is being applied to the condition type. The final box is used to specify the exact condition which must be met. The plus button will add a new condition and the minus button will remove a rule.
The second box is a list of actions which will be taken on messages which meet the conditions. These actions are the WHAT part of the rule, specifying what action is taken on messages which meet the conditions. The first drop down contains a list of action types. The second drop down is used to further specify what action is taken. The plus button is used to add new actions to the rule. The minus button is used to remove actions from the rule.
Press the OK button to enable the rule within your email client.
Troubleshooting
Relay Access Denied
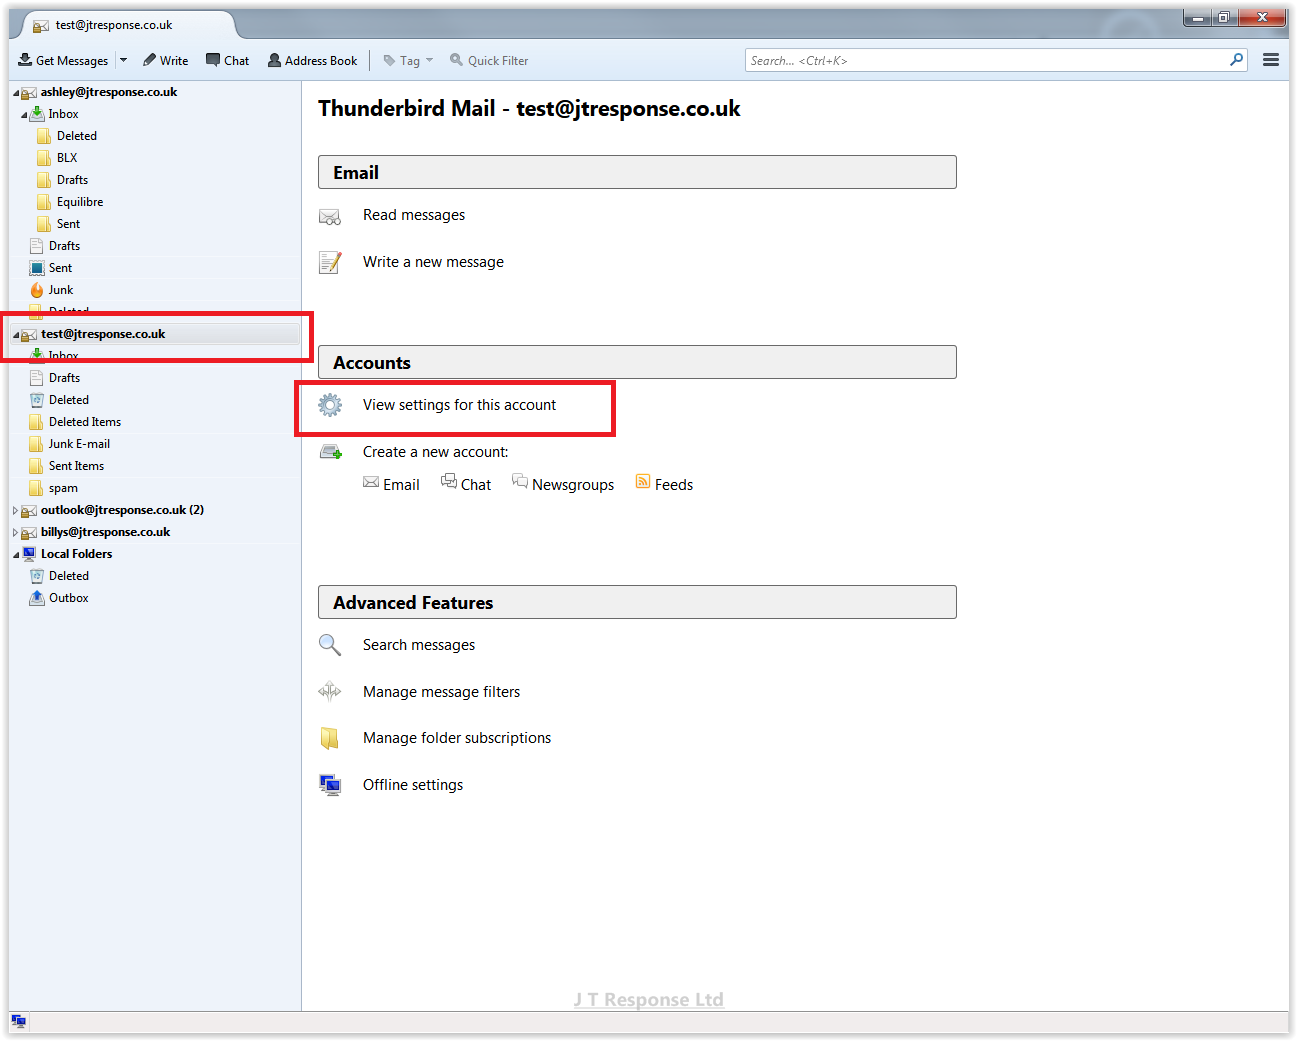
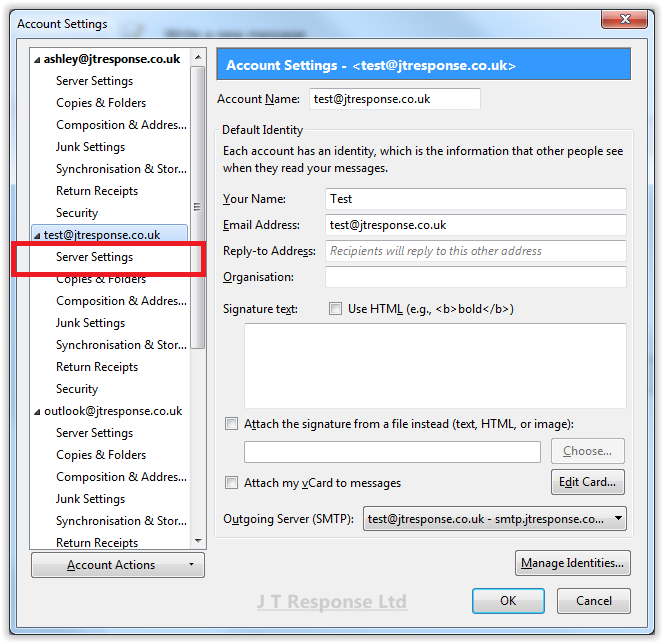
Choose account from the side bar on the left. Press ‘View settings for this account’ option.
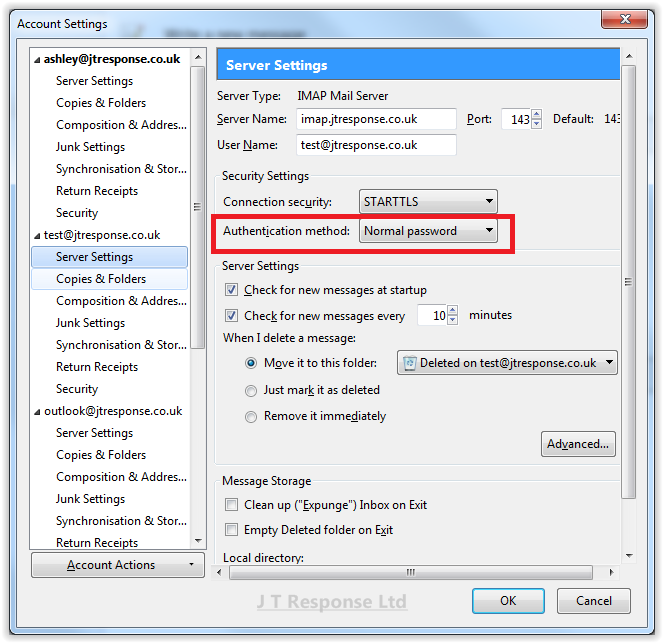
Choose ‘Server Settings’ under your account name.
Choose the ‘Normal Password’ Authentication method option under the ‘Security Settings’ section.
Summary
I hope that this guide will help you to setup, configure and use Mozilla Thunderbird 30.0. Most of the steps taken in this guide should be similar for other versions of Thunderbird but I cannot guarantee this, therefore if you are using a different version, please follow these steps at your own risk. If you have any questions about this guide, please comment below and I will be happy to assist you.
Date: September 1, 2014
Category: Email Client Guides
Author: Ashley Peck
Tags: 31.0, beginner, client, configuration, email, guide, IMAP, mozilla, POP3, rules, setup, SMTP, spam, thunderbird