Microsoft Office Outlook 2010 Quick Start Guide
Recently, we’ve been hearing many more reports of people having various problems configuring and setting up their email accounts using varying range of email clients. This guide will be the one of a series of guides which aims to help you through the process of configuring your email client to receive emails from your email account. Additionally, it will also show you additional useful settings and features which may help enhance your experience when using these email clients.
Today, we will be looking at the email client which seems to be causing users the most problems, Microsoft Outlook. The version I will be using is Microsoft Office Outlook 2010. I will include additional guides to help support users still using older versions.
This guide is aimed at users wishing to configure their email client quickly.If you wish to view an advanced setup guide, please look at this guide.
Microsoft Office Outlook 2010
Setup
Upon loading the client, you will presented with a setup wizard.
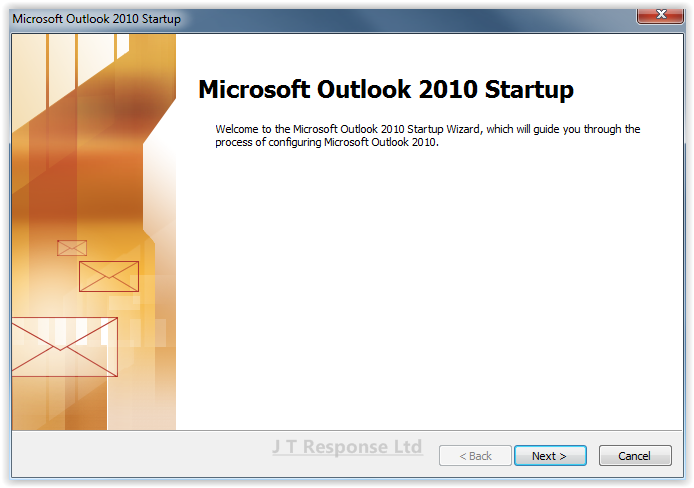
Follow the setup wizard until you reach the screen where you can add a new account.
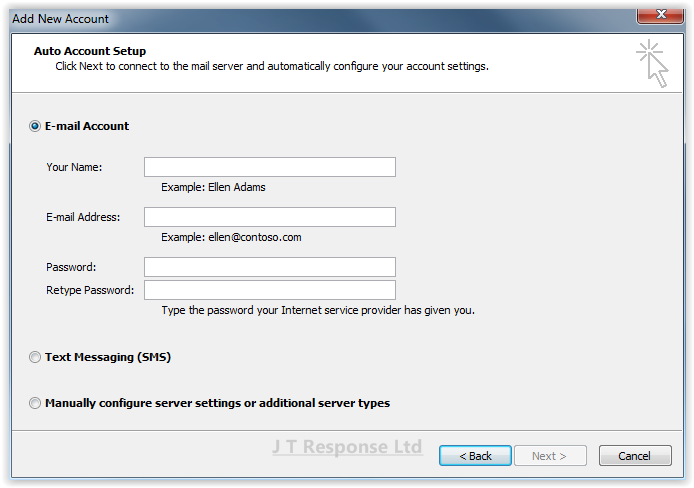
Press the Email Account option.
E-mail Account
This option tries to automatically connect to your email account using the details you provide. For this option, there are 3 fields which you must complete:
- Your Name: This should be your full name.
- E-mail Address: This should be your email address.
- Password: This should be the password you use to log in to your email account.
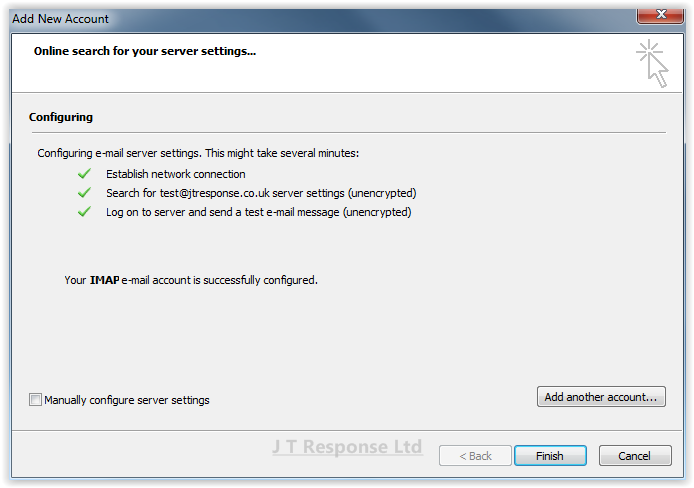
Once you have filled out these details, Outlook will attempt to find and connect to your email server. If Outlook completes all this successfully, you will be shown a confirmation screen which will tell you that you have successfully configured your email account.
Manual Configuration
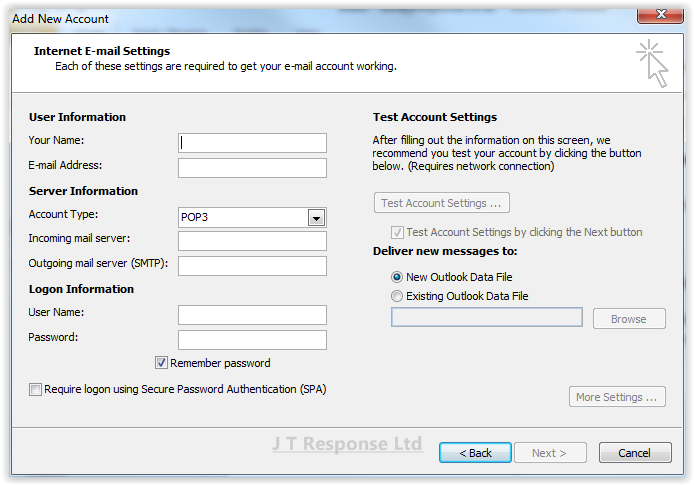
If you choose the manual configuration option, press the Internet E-mail option and press next. On the next screen, you will be presented with several fields which need completing in order to connect to your email account.
- Your Name: This should be your full name.
- E-Mail Address: This should be your email address.
- Account Type: If you are connecting to your email account using several devices, choose IMAP. If you are connecting to your email account using one device, choose POP3.
- Incoming Mail Server: This should be as follows: mail.<YOUR DOMAIN NAME>.co.uk. For example, mail.jtresponse.co.uk.
- Outgoing Mail Server (SMTP): This should be the same as what is entered for incoming mail server. It should follow the same format of mail.<YOUR DOMAIN NAME>.co.uk. For example, mail.jtresponse.co.uk.
- User Name: This should be your email address.
- Password: This should be the password used to log in to your email address.
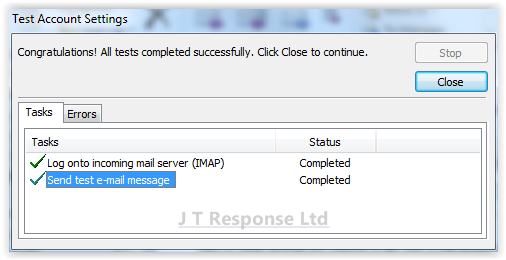
Press the Test Account Settings button to test whether Outlook can connect to your account. If these tests complete successfully, Outlook will tell you that all of the tests completed successfully and you should be able to connect to your email account.
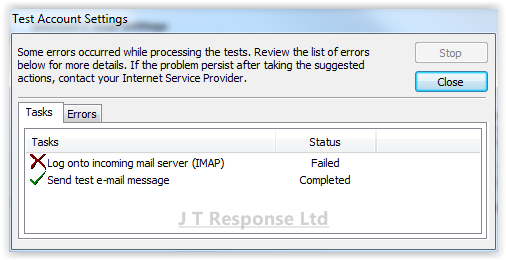
If the tests fail, Outlook was unable to connect to your email account. In this case you should go back and check over the details you entered for any mistakes as Outlook is having trouble connecting to the email account you are specifying.
Features
Create Rule
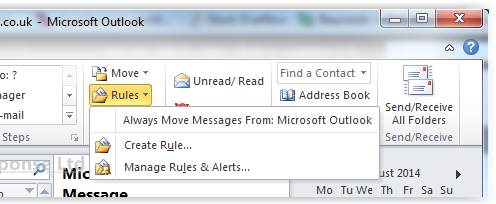
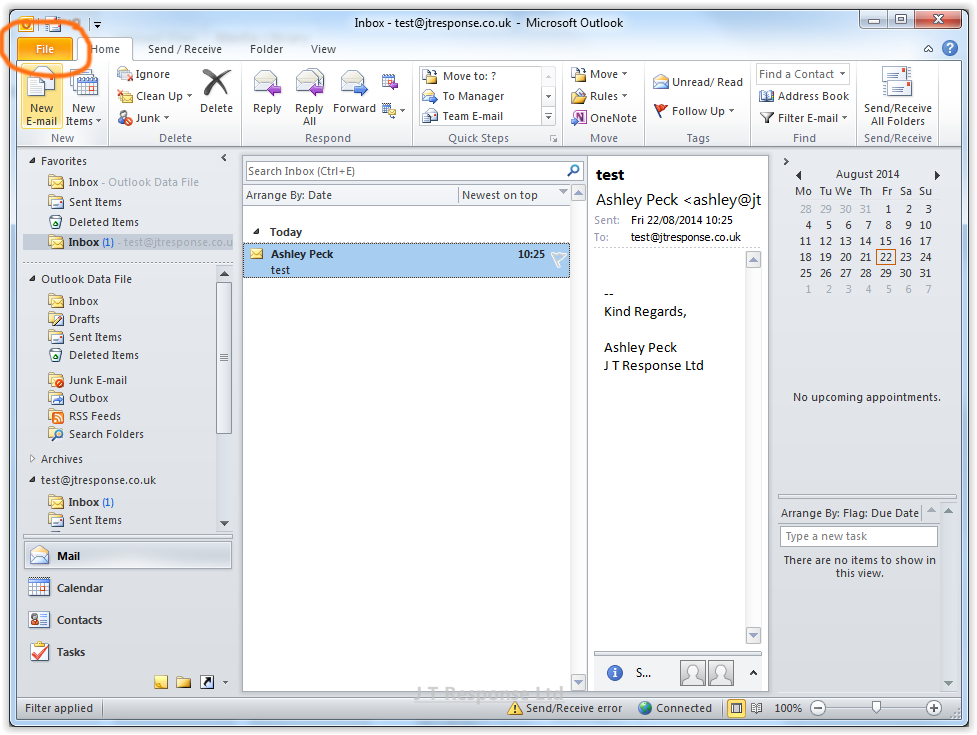
To create a rule, press the Rules button in the ribbon. This will create a drop-down menu whereby you can create a new rule or manage existing rules. Alternatively, you can select the Manage Rules & Alerts button under the Info tab in the File menu.
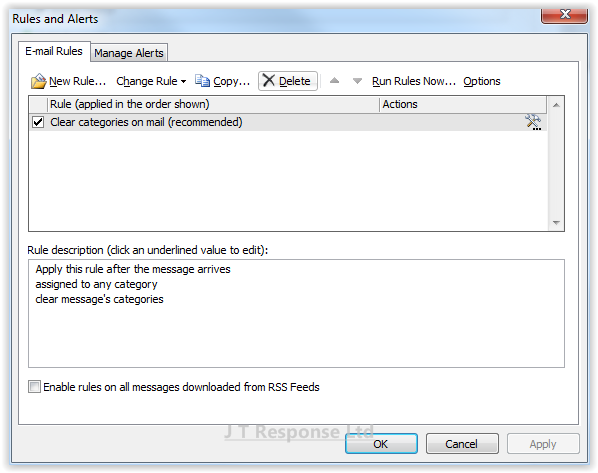
To add a new rule, press the New Rule button at the top of the window.
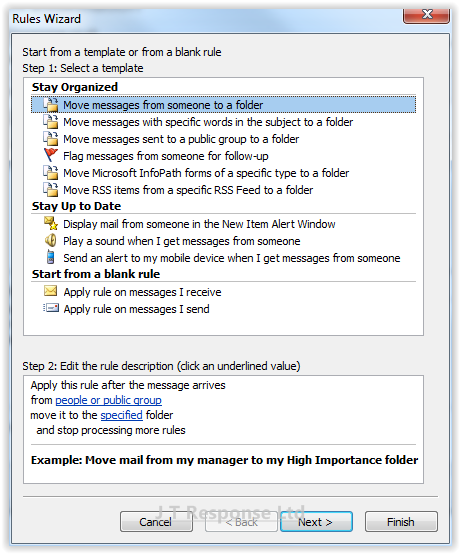
From here you can choose from several template rules or create your own using a blank rule.
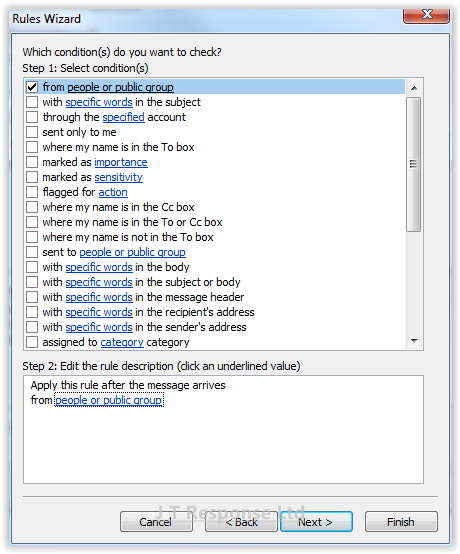
The next screen allows you to apply conditions to the rule.
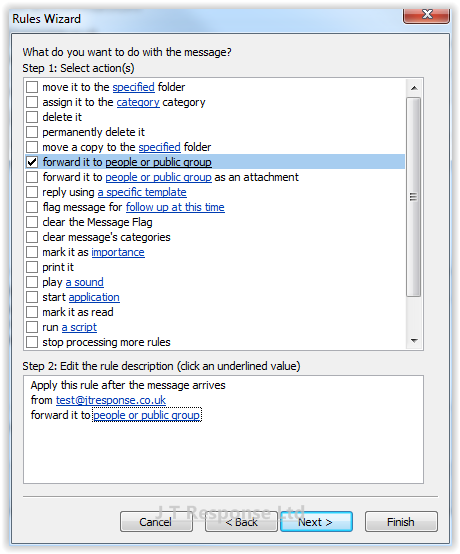
The next screen allows you to apply actions to the rule.
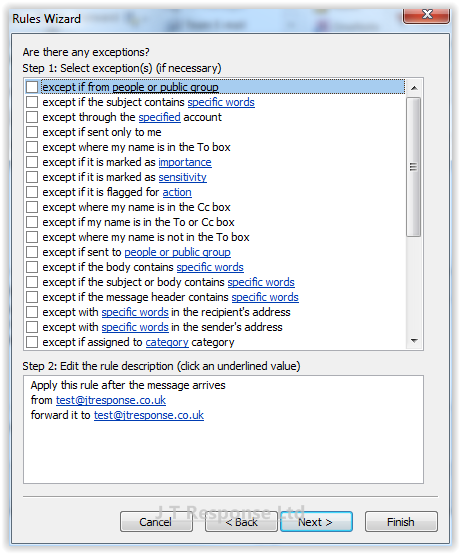
Finally, the last screen allows you to add any exceptions to the rule.
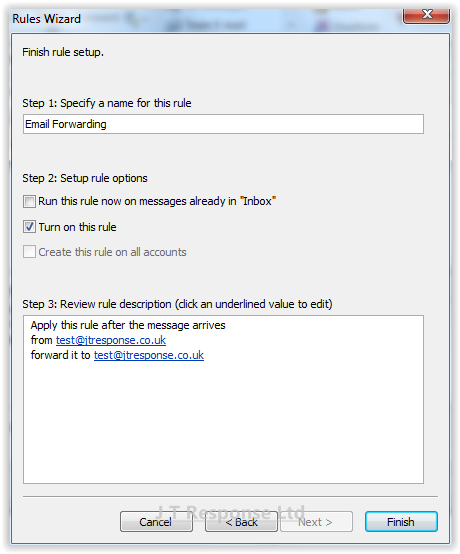
The final screen provides you with an overview of the rule conditions, actions and exceptions. You can choose to run the rule on the current inbox or just leave the rule on to activate on any future conditions. Press finish and the rule will be active.
Troubleshooting
None of the authentication methods supported by this client are supported by your server.
This error message will be displayed when your email client has been configured to use an authentication method which is not supported by the email server you are trying to connect to. In order to resolve this issue, please follow the following steps:
Navigate to the File menu.
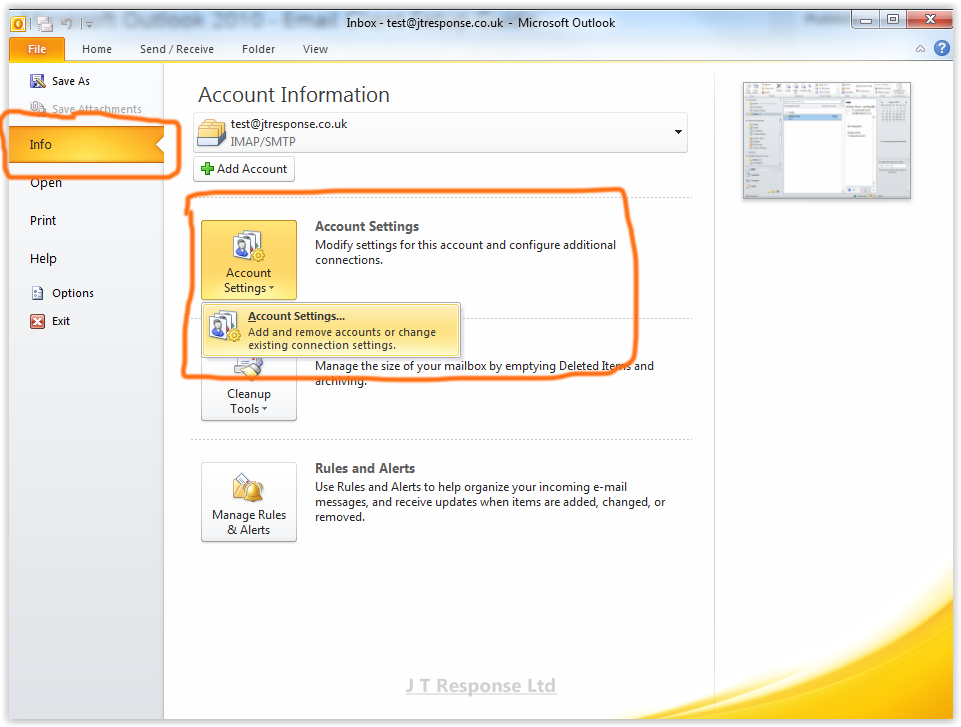
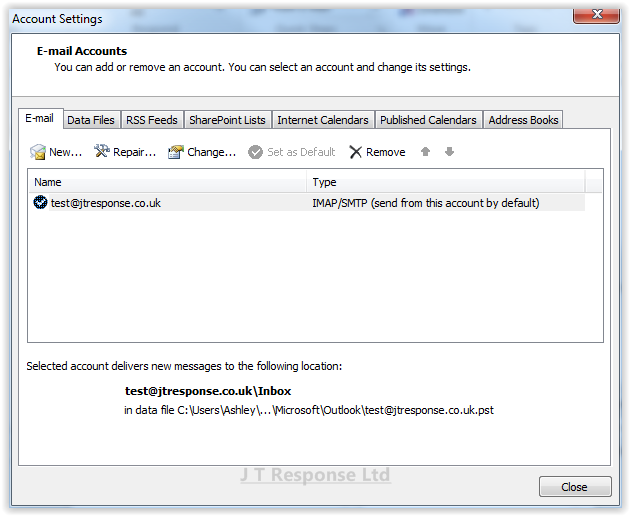
Select the Info tab on the left sidebar and then select the Account Settings button.
Select the E-mail tab and double-click on the email address you are having issues with.
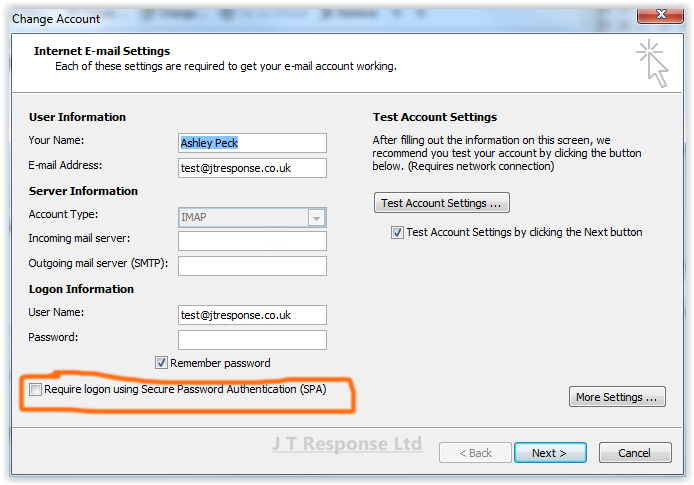
Ensure that ‘Require logon using Secure Password Authentication (SPA)’ is unchecked.
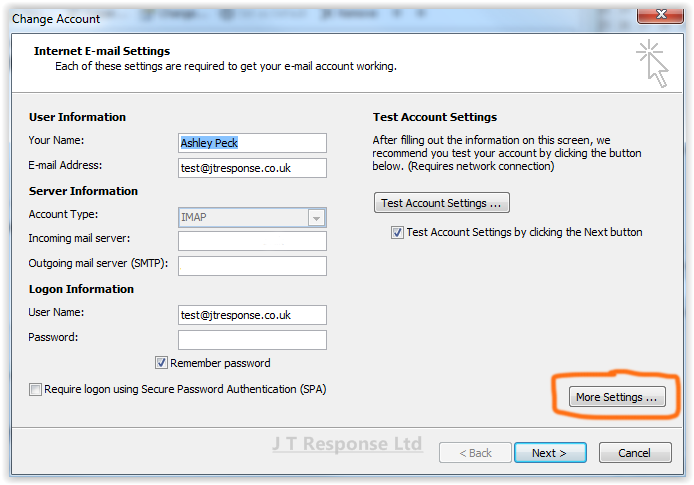
Press the ‘More Settings’ button
Navigate to the ‘Outgoing Server’ tab. Ensure that the ‘My outgoing server (SMTP) requires authentication.’ checkbox is unchecked.
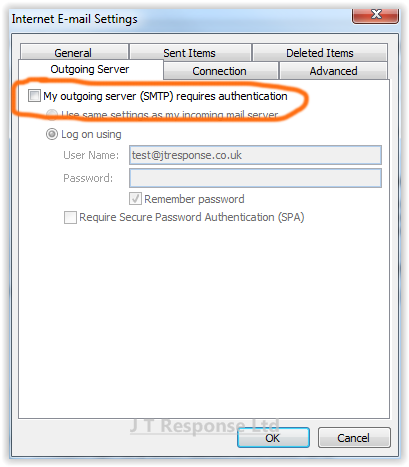
Press OK and then Next to save the changes to your email client configuration.
This issue should now have been resolved. If you are still experiencing issues, please contact your email host in order to receive additional assistance in resolving this issue.
Your server does not support the connection encryption type you have specified.
This error message will be displayed when your email client has been configured to use a connection encryption type which is not supported by the email server you are trying to connect to. In order to resolve this issue, please follow the following steps:
Navigate to the File menu.
Select the Info tab on the left sidebar and then select the Account Settings button.
Select the E-mail tab and double-click on the email address you are having issues with.
Press the ‘More Settings’ button.
Navigate to the ‘Advanced’ tab. Change the Incoming and Outgoing server encrypted connection types to ‘Auto’ in the drop down menu’s.
Press OK and then Next on the Change Account window to save the changes to your email client configuration.
This issue should now have been resolved. If you are still experiencing issues, please contact your email host in order to receive additional assistance in resolving this issue.
The server you are connected to is using a security certificate that cannot be verified. The target principal name is incorrect.
This window will appear when Outlook recognises differences between the email server you are connecting to and the domain name provided on the certificate which it receives when connecting to the email server. This issue may present itself depending on how the email server is configured by your email host. If you are certain that all the details which you have entered are correct, it is safe to press Yes to this window.
In most circumstances, this window will not appear after you have accepted it for the first time. However, in some situations, this window may appear every time Microsoft Outlook is launched. If this is the case, the solution below may or may not work, we have received mixed results whereby the solution has worked for some people and for others it has not worked. If the solution does not work, we are currently looking into alternative solutions but in the mean time, you will be perfectly safe pressing Yes every time this window appears.
Navigate to the File menu.
Select the Info tab on the left sidebar and then select the Account Settings button.
Select the E-mail tab and double-click on the email address you are having issues with.
Press the ‘More Settings’ button.
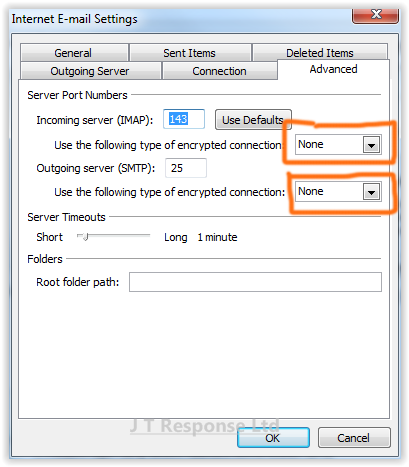
Navigate to the ‘Advanced’ tab. Change the Incoming and Outgoing server encrypted connection types to ‘None’ in the drop down menu’s.
Press OK and then Next on the Change Account window to save the changes to your email client configuration.
Summary
I hope that this guide will help you to setup, configure and use Microsoft Outlook 2010. Guides may become available in the future for other versions of Microsoft Outlook, however I believe that most of the steps in this guide should be similar to steps required in these versions. If you have any questions about this guide, please comment below and I will be happy to assist you.