Mac Mail Filters Guide
The J T Response email server uses Spam Assassin to mark messages likely top be spam.
In this post we are going to explain how to set up your own personal filters on the Mac Mail App to move messages marked as SPAM to your Junk folder. We used Mail on Yosemite. If you have a different version the details may vary slightly.
To start we need to get to the part of Mail were we can edit filters.
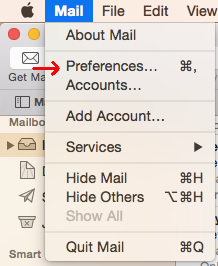
1. Open up Mail and in the top bar you will see some options click on Mail.

2. Click on Preferences. This will open a window.
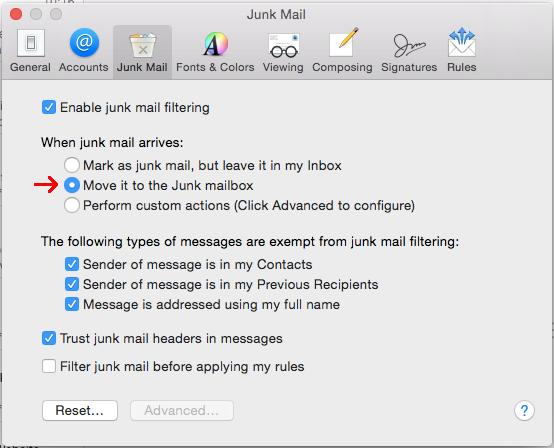
3a. Select the Junk Mail tab.
3b.Then make sure that the “move it to the junk mailbox” option is selected
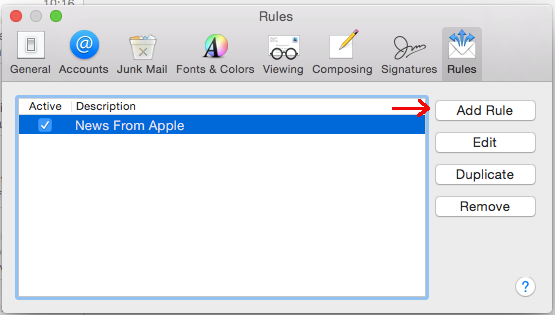
4a. Click on the Rules tab.
4b.Then Select the Add Rule option This will open a new window.
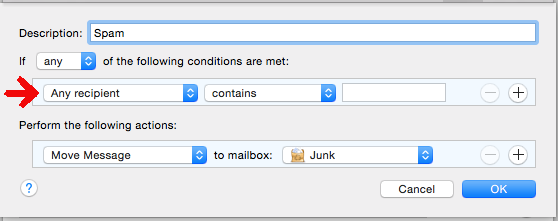
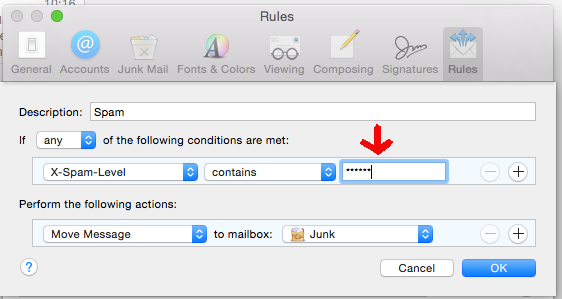
5. For Description you name what this rule is going to be e.g(“spam filter”)

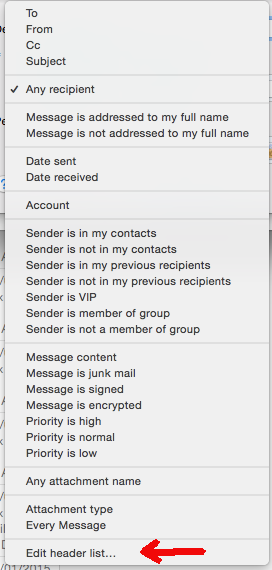
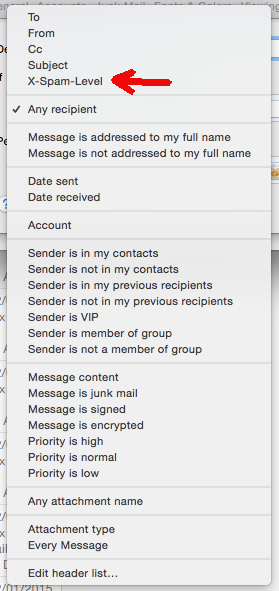
6a. Click on the drop down with Any recipient selected then
6b. Select Customize headers located near the bottom of the drop down. This will open a new window.
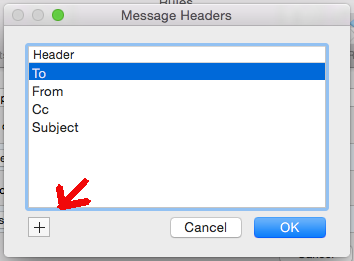
7a. Click on the plus sign in the bottom left of the window.
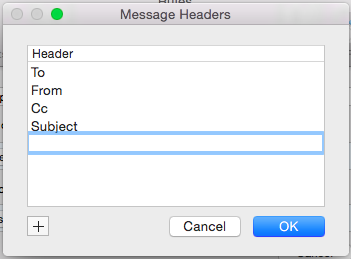
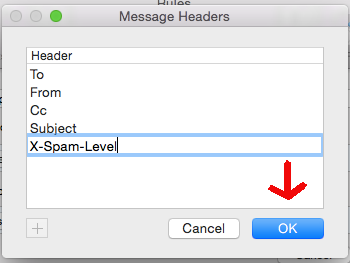
7b.This will give you a new field enter into this field X-Spam-Level.
8a. Click on the drop down with Any recipient selected then
8b. Select X-Spam-Level located near the bottom of the drop down.
9. Enter into the empty Text Field 6 Stars(*).
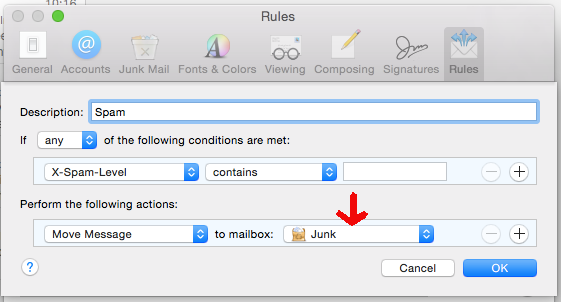
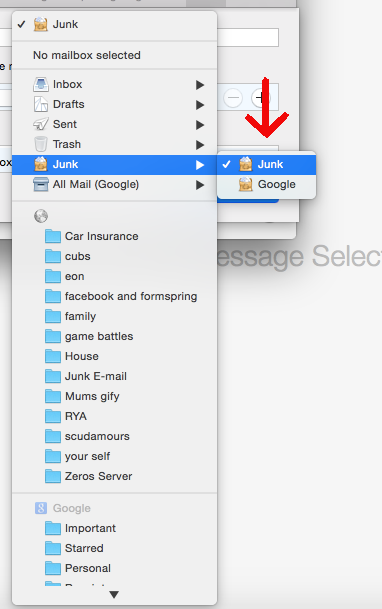
10a. Set the mailbox drop down to Junk.
10b.By clicking on the drop down box and selecting the junk option
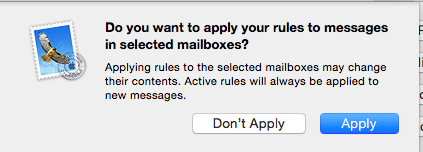
11. Click OK and you will get pop-up click on apply.
12. You’re Done!!