Microsoft Office Outlook 2000 Quick Start Guide
Recently, we have been hearing more reports of people having various problems configuring and setting up their email accounts using varying range of email clients. This guide will be one of a series of guides which aims to help you through the process of configuring your email client to receive emails from your email account. Additionally, it will also show you additional useful settings and features which may help enhance your experience when using these email clients.
Today, we will be looking at the email client which seems to be causing users the most problems, Microsoft Outlook. The version I will be using is Microsoft Office Outlook 2000, which is an older version. If you wish to view a guide for an up-to-date version of Microsoft Outlook, please check out the Outlook 2010 guide in this blog.
This guide is aimed at users wishing to configure their email client quickly. if you wish to view an advanced user setup guide, please look at this guide.
Microsoft Office Outlook 2000
- Setup
- Features
- Display Name: This should be your full name.
- E-mail Address: This should be your email address.
- Protocol: If you are connecting to your email account using multiple devices, choose IMAP. If you are connecting to your email account using one device, choose POP3.
- Incoming mail server: This should be as follows, mail.<YOUR DOMAIN NAME>.co.uk. For example, mail.jtresponse.co.uk.
- Outgoing mail server: This should be as follows, mail.<YOUR DOMAIN NAME>.co.uk. For example, mail.jtresponse.co.uk.
- Account Name: Your email address.
- Password: Your password.
- Log on using Secure Password Authentication (SPA): This should be unchecked.
- Run this rule now on messages already in “Inbox”: This will run your rule against emails which you have already received and are in your inbox.
- Turn on this rule: This will specify whether the rule will become active when you finish the Rules wizard.
Setup
Upon loading the client, you will be presented with a setup wizard.
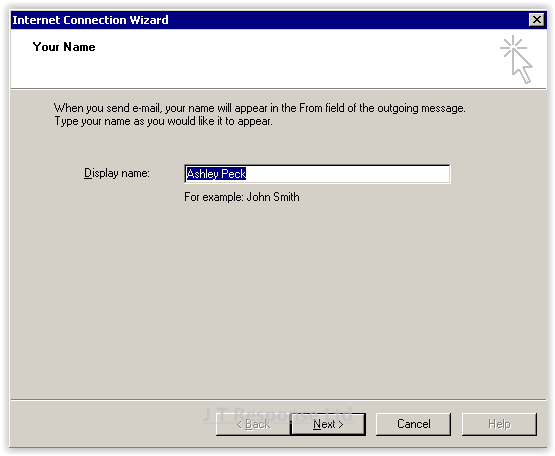
Enter a display name to be associated your email account.
Press Next to continue.
Automatic Email Account Setup
In Microsoft Outlook 2000, there is no option to automatically configure and connect to email accounts. Due to this, I will be unable to provide a guide for automatic setup. Please refer to the Manual Email Account Setup section of this guide to learn how to connect to your email account using this email client.
Manual Email Account Setup

Enter the email address of your email account.
Press Next to continue.
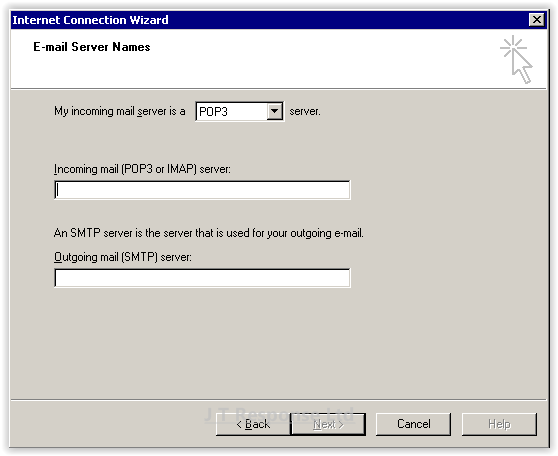
The next screen will prompt you to enter several pieces of information:
Press Next to continue.
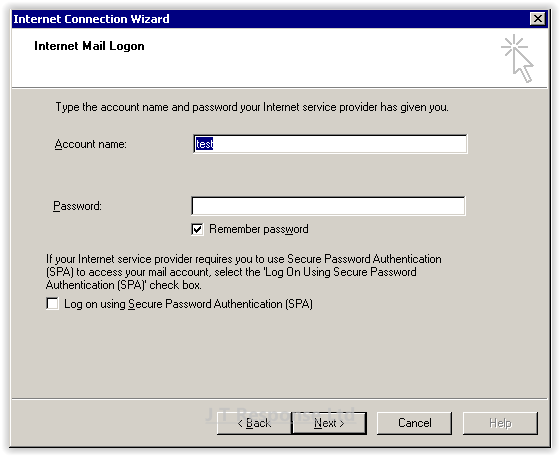
Enter your log in information for your email account:
Press Next to continue.
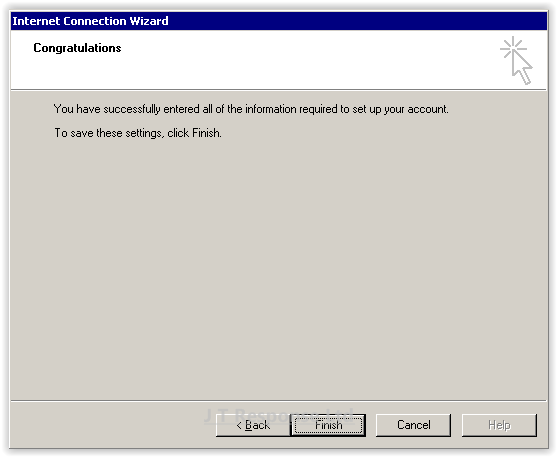
Your email client should now be correctly configured to connect to your email account. If you have any issues connecting to your account, please ensure that all the details which you have entered are correct. If the problem still persists, contact your email host for further assistance.
Features
Create Rule

Press the Tools button on the menu bar and then select the Rules Wizard option.
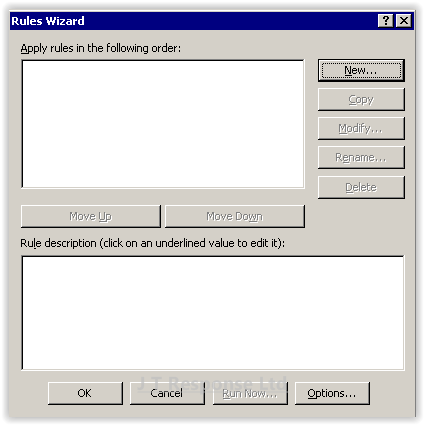
Press the New button to create a new rule. Alternatively, Press the Modify and Delete buttons respectively to modify and delete existing rules.

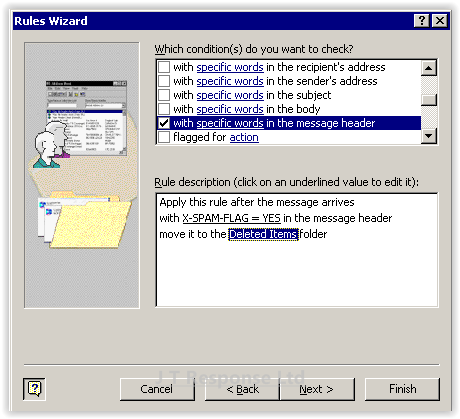
Press the New button. The top box in this window allows us to select the type of condition which we wish to use in our rule. The second box is used to further specify this condition.
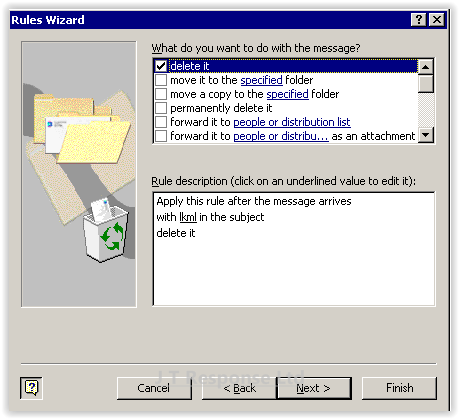
The next screen is where we can specify what action the rule will carry out. The top box is used to specify the type of action which is to be taken. The bottom box is used to further specify the action. Once you have selected all of the actions you wish to carry out, press the Next button.

The next screen is used to specify exceptions to the rule. Once you have finished adding exceptions, press the Next button.
This final screen will allow you to assign a relevant name to your rule, as well as giving you a summary of all of the features of your rule which you have selected. In addition to these pieces of information there are two checkboxes.
Press the Finish button to finish the creation of your rule.
Summary
I hope that this guide will help you to setup, configure and use Microsoft Outlook 2000. Guides may become available in the future for other versions of Microsoft Outlook, however I believe that most of the steps in this guide should be similar to the steps required in these versions. If you have any questions about this guide, please comment below and I will be happy to assist you.